Emergency Fund vs Savings Account: Where to Keep Your Backup Cash in 2026?

Emergency fund protecting savings from unexpected expenses
Home » Archives for September 2026

Imagine you suddenly need ₹10,000 for a medical bill, urgent travel, a job gap, or an unexpected repair. If all your money is sitting in the same account you use for everyday spending, you may end up using money meant for other goals—or worse, borrowing to cover the expense.

That’s where an emergency fund becomes important. But there’s one question many beginners have: should an emergency fund be kept in a regular savings account, or should you keep it somewhere else?

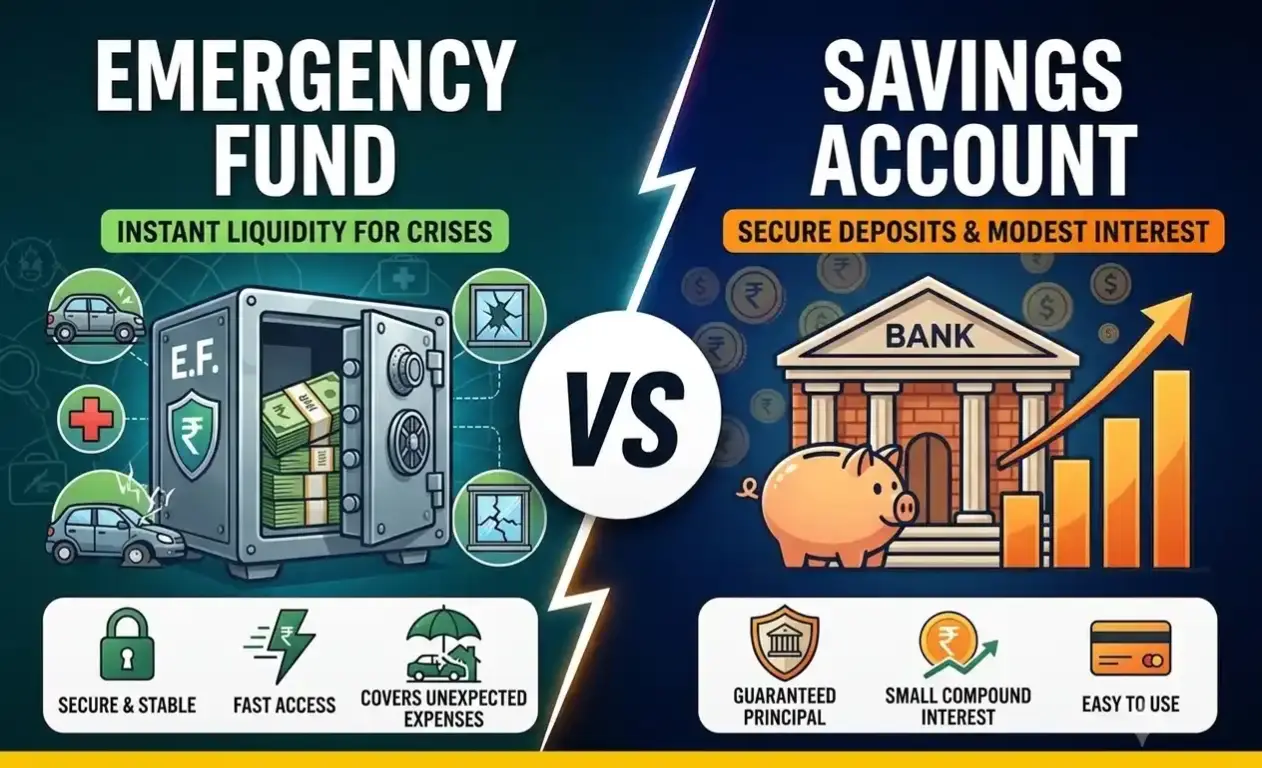
The important thing to understand is that an emergency fund and a savings account are not competing products. An emergency fund is money reserved for unexpected expenses, while a savings account is one of the places where you can keep that money.

In this guide, we’ll break down emergency fund vs savings account, how much you should keep aside, and the practical places where you can keep your emergency money in India—without sacrificing safety and easy access.

What You’ll Learn in This Guide

By the end of this guide, you’ll know:

  • Emergency fund vs savings account — dono mein kya difference hai aur emergency money ke liye kya purpose hai.
  • How much emergency fund you need — 3–6 months ke expenses ka target kaise calculate karein.
  • Risks of keeping all your money in one account — low returns aur everyday spending ka emergency savings par kya effect ho sakta hai.
  • Where to keep your emergency fund in India — savings account, sweep-in FD aur liquid mutual funds jaise options ko samjhenge.
  • How to build an emergency fund with a low or irregular income — fixed salary na hone par bhi backup fund kaise banayein.
  • Common emergency fund mistakes — PPF, ELSS ya ghar par bahut zyada cash rakhne jaise mistakes se kaise bachein.
  • Practical FAQs — credit card aur digital gold ko emergency backup ke liye use karna chahiye ya nahi.

What Is an Emergency Fund and Why Do You Need It?
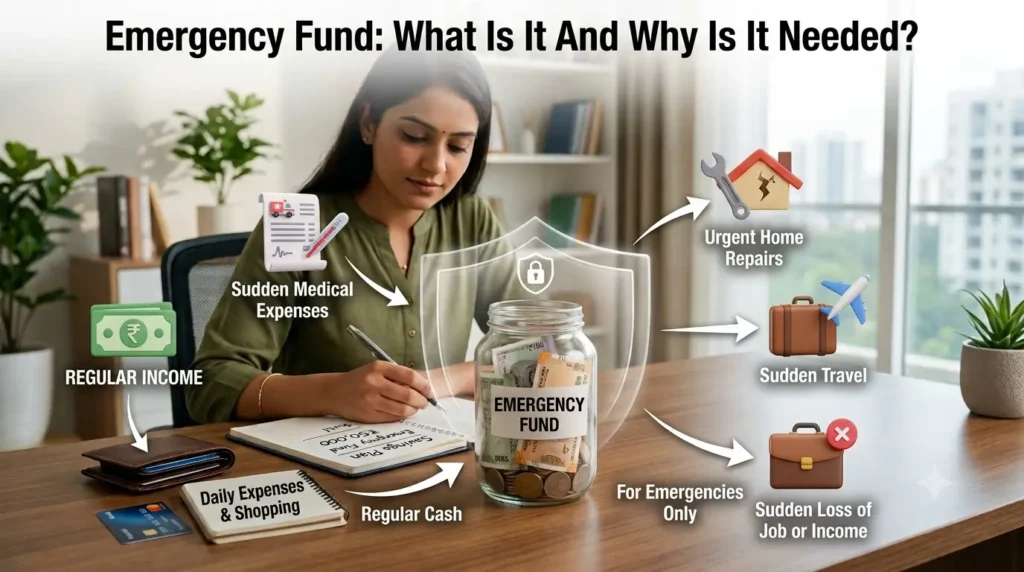
An emergency fund is money kept aside for unexpected expenses that can disturb your normal budget. It can help you handle things like a medical bill, urgent travel, essential repair, job loss, or a temporary income gap without immediately borrowing money.

Think of it as your financial safety net. Your regular income already has many jobs—food, rent, bills, transportation, savings and investments. An emergency fund is there for the expenses you didn’t see coming.

Emergency Fund vs Regular Savings: What’s the Difference?

The main difference between an emergency fund and regular savings is their purpose. Emergency savings are for unexpected problems, while regular savings are often used for planned expenses or goals.

For example, if you’re saving ₹40,000 for a laptop, that’s goal-based savings. But if you keep ₹60,000 aside in case your income stops temporarily or an unexpected expense appears, that’s your emergency fund.

Money TypePurposeExample
Emergency fundUnexpected expensesMedical bill, job gap, repair
Regular savingsGeneral savingMoney you’re building up
Goal savingsPlanned expenseLaptop, education, travel
InvestmentsLong-term goalsRetirement, wealth building

One important thing: an emergency fund doesn’t have to be a special financial product. You can keep it in a savings account. What makes it an emergency fund is the purpose you’ve given that money.

Can an Emergency Fund Be Kept in a Savings Account?

Yes, an emergency fund can be kept in a savings account, and a separate account can make it easier to avoid spending that money accidentally.

I learned this from my own saving habit too. Instead of keeping all my money in the account I used for everyday expenses, I started putting some money into a separate account. The amount wasn’t always big, but keeping it separate made me think twice before touching it.

Gradually, that separate balance became my backup money.

This is a simple idea that can work for beginners: when your income comes in, move a small amount into your emergency fund before you start spending on non-essential things.

For example, if you receive ₹25,000 and can comfortably save ₹2,000, you could move that ₹2,000 into your separate emergency savings account.

The U.S. Consumer Financial Protection Bureau also recommends keeping emergency savings specifically for unplanned expenses and notes that even a small amount can provide some financial security.

You can use our Budget Calculator to understand your monthly expenses and decide how much you can realistically save.

For eligible bank deposits in India, DICGC deposit insurance currently covers up to ₹5 lakh per depositor per bank, subject to its applicable rules.

How Many Months of Expenses Should You Save?

A common starting target is 3–6 months of essential expenses, but the right amount depends on your income, responsibilities and financial situation.

Use this simple formula:

Monthly essential expenses × Number of months = Emergency fund target

For example, if your essential expenses are ₹20,000 per month:

  • 3 months = ₹60,000
  • 6 months = ₹1,20,000

You don’t have to save ₹1.2 lakh immediately. Start with a smaller milestone:

₹10,000 → ₹25,000 → ₹50,000 → 3 months → 6 months

If your income is irregular, you may need a larger cushion because your monthly income can change. For example, if you earn ₹18,000 one month and ₹30,000 the next, you can save more during stronger months and a smaller amount during difficult months.

MoneyHelper in the UK also uses three to six months of essential outgoings as a common rule of thumb for emergency savings.

Why Is an Emergency Fund Important?

An emergency fund gives you money to fall back on when something unexpected happens, reducing the need to immediately borrow or disturb other financial goals.

Imagine you suddenly need ₹15,000.

Without an emergency fund, you might need to borrow, use a credit card, delay another payment, or sell an investment.

With an emergency fund, you can use part of your reserve and then rebuild it later.

That’s why the first priority of emergency money should be safety and accessibility, rather than chasing the highest possible return.

If you’re currently managing a tight budget, you can also read our guide on How to Budget When Living Paycheck to Paycheck on a Low Income.

Quick Emergency Fund Checklist

  • ☐ I know my monthly essential expenses.
  • ☐ I have started saving a separate emergency fund.
  • ☐ I have calculated my initial target.
  • ☐ I can access the money when a genuine emergency happens.
  • ☐ I’m not treating the fund as normal spending money.
  • ☐ I’m gradually working toward 3–6 months of essential expenses, if appropriate for my situation.
  • ☐ I review the target when my income or expenses change.

You don’t need a huge amount to start. The important thing is to create the habit of keeping some money aside for the unexpected.

The Hidden Risks of Keeping All Your Emergency Cash in a Regular Savings Account

Keeping your emergency fund in a savings account is not automatically a bad idea. In fact, easy access and safety are more important than chasing high returns when it comes to emergency money.

The problem is usually not the savings account itself. The bigger issues are keeping your emergency money mixed with everyday spending money and ignoring how inflation affects its purchasing power.

If you’re still trying to understand where your money goes every month, you can first use our Budget Calculator to calculate your regular expenses.

Why Low Interest Rates Are Losing You Money to Inflation

When your savings earn less than the rate at which prices are rising, your money can lose purchasing power over time. Your account balance may stay the same or increase slightly, but the same amount may buy fewer things later.

For example, imagine you keep ₹1,00,000 in a savings account for several years.

If the interest you earn is lower than inflation, the ₹1,00,000 may not have the same purchasing power in the future. This is why simply looking at your account balance doesn’t tell the whole story.

The U.S. Bureau of Labor Statistics tracks changes in consumer prices through the Consumer Price Index (CPI), which is one way economists measure inflation.

But this does not mean you should put your emergency fund into risky investments just to beat inflation.

Your emergency fund has a different job.

Think about its priorities like this:

  1. Safety
  2. Easy access
  3. Reasonable return
  4. Higher return only when the first two aren’t compromised

The Consumer Financial Protection Bureau recommends keeping emergency savings somewhere safe and accessible because the money may be needed when an unexpected expense occurs.

So instead of asking only:

“Where can I get the highest return?”

Ask:

“Where can I keep this money safe and access it quickly when I actually need it?”

That question is much more useful when you’re dealing with an emergency fund.

The Temptation of Impulse Spending with Debit Cards

Keeping your emergency fund in the same account you use for everyday spending can make it easier to spend the money without realising it.

Suppose your bank balance shows ₹80,000.

You know that ₹50,000 of it is actually your emergency fund, but the entire amount is sitting in the same account you use for UPI payments, shopping, food and entertainment.

Then you see something you want to buy.

Your brain sees:

“I have ₹80,000.”

But your actual spending money is only ₹30,000.

This is one reason a separate emergency savings account can be useful. You can still access the money when there’s a genuine emergency, but it isn’t constantly sitting in front of you while you’re making everyday purchases.

The CFPB also discusses keeping emergency savings in a dedicated place that is safe and accessible while reducing the temptation to spend it on non-emergency purchases.

A simple setup could look like this:

  • Main account: salary, UPI, bills and daily expenses
  • Emergency fund: unexpected expenses only
  • Goal savings: laptop, education, travel or other planned purchases
  • Investments: long-term financial goals

This separation doesn’t have to be complicated.

For example, if you receive ₹25,000, you might decide that ₹2,000 goes toward your emergency fund, while the remaining money is used for your regular budget and other goals.

The exact amount will depend on your income and expenses. The important part is giving your emergency money a clear purpose.

If you’re managing several financial goals at the same time, our guide on How to Organize Multiple Savings Goals Before 2027 can help you separate different savings targets instead of mixing everything together.

How to Keep Your Emergency Fund Accessible Without Making It Easy to Spend

The simplest approach is to keep your emergency money separate from your everyday spending account while making sure you can still access it when a genuine emergency happens.

For example, suppose your essential expenses are ₹30,000 per month.

A 3-month starter target would be:

₹30,000 × 3 = ₹90,000

Instead of keeping that ₹90,000 mixed with your normal spending balance, you could keep it in a separate suitable account or another low-risk, accessible option.

This gives your money a specific job:

Everyday account → Spend
Emergency account → Protect
Investment account → Grow for long-term goals

And if you ever have to use the emergency fund, that’s exactly what it is there for. You can then rebuild it gradually.

If your current income is tight and saving feels difficult, our guide on How to Budget When Living Paycheck to Paycheck on a Low Income can help you find room in your budget before setting a larger emergency-fund target.

A Simple Rule to Remember

Don’t choose an emergency-fund option only because it offers a higher return. Choose a place where your money is reasonably safe, accessible and less likely to be spent accidentally.

Your emergency fund isn’t designed to make you rich.

Its job is to make an unexpected financial problem easier to handle.

3 Best and Safest Places to Keep Your Emergency Fund in India

The best place for an emergency fund should give you two things: easy access and reasonable safety. You don’t necessarily need to keep the entire fund in one account. You can divide it between a regular savings account and another low-risk option depending on how much money you have.

1. Sweep-in Fixed Deposits: A Balance Between Liquidity and Returns

A sweep-in fixed deposit can be useful for keeping part of your emergency fund while still having relatively easy access to the money.

For example, suppose you have a ₹1 lakh emergency fund. You could keep ₹30,000 in a savings account for immediate expenses and place the remaining ₹70,000 in a sweep-in FD, depending on the bank’s rules and terms.

The advantage is that the FD portion may earn more interest than money sitting entirely in a normal savings account. When you need money, the linked sweep facility may automatically break the required portion of the FD, depending on the bank’s conditions.

However, don’t assume every sweep-in FD works the same way. Check the bank’s rules for minimum balance, premature withdrawal, sweep limits, interest calculation and how quickly the money becomes available.

Also, eligible bank deposits such as savings and fixed deposits are covered by DICGC deposit insurance up to ₹5 lakh per depositor per bank, subject to the applicable rules.

Best suited for: People who already have some emergency savings and want part of it to earn more while keeping access reasonably convenient.

2. A Separate Savings Account from a Scheduled Bank

A separate savings account is one of the simplest ways to keep an emergency fund away from your everyday spending money.

For example:

  • Main account → salary, UPI and regular expenses
  • Emergency account → medical bills, job gap and urgent repairs
  • Goal account → travel, education or a future purchase

This separation can make your emergency fund easier to protect because you are less likely to accidentally spend it on everyday purchases.

Before opening a separate account, compare things such as interest rate, minimum balance requirements, account charges, ATM/UPI access and withdrawal convenience.

If you’re keeping a larger amount in bank deposits, also understand the DICGC limit. Deposits in different accounts at the same bank and same ownership capacity are generally aggregated when calculating the ₹5 lakh insurance limit. Deposits held with different banks have separate coverage limits.

You can also use your Budget Calculator to estimate your monthly essential expenses and work out how much emergency money you need.

Best suited for: Beginners who want a simple, accessible and easy-to-manage emergency fund.

3. Liquid Mutual Funds: An Option to Understand Carefully

Liquid mutual funds can be considered for some short-term money, but they should not be treated as the same thing as a bank savings account or FD.

A liquid mutual fund invests in short-term money-market and debt instruments. Its value can change, and mutual funds are not covered by DICGC deposit insurance. DICGC specifically lists mutual funds among the products that are not covered by its deposit insurance scheme.

SEBI’s investor disclosures also make clear that mutual fund investments involve investment risks and that returns are not guaranteed.

So, if you’re building your first emergency fund, you don’t need to move everything into a liquid mutual fund just to chase a potentially higher return. The first priority should be having money available when you genuinely need it.

If you already have a well-built emergency fund and understand how liquid mutual funds work, you can decide whether they fit a portion of your short-term money.

Best suited for: Someone who understands mutual funds and wants to consider a separate short-term investment option—not someone looking for a guaranteed emergency-fund product.

Which Option Should You Choose?

OptionAccessMain BenefitImportant Limitation
Separate savings accountVery easySimple and accessibleInterest may be modest
Sweep-in FDRelatively easyCombines FD with linked accessBank-specific conditions
Liquid mutual fundThrough redemptionPotential short-term returnMarket-linked and not DICGC-insured

For most beginners, the important thing isn’t finding the option with the highest possible return. Your emergency money exists for one reason: to be available when something unexpected happens.

If you’re still building your first emergency fund, start small and make the habit automatic. You can later increase the amount as your income grows.

You can also read How to Organize Multiple Savings Goals Before 2027 if you are saving for an emergency fund along with other financial goals.

And if your income is currently tight, How to Budget When Living Paycheck to Paycheck on a Low Income can help you find room in your monthly budget for emergency savings.

How to Connect Your Emergency Fund with Your Budgeting Strategy?

Your emergency fund works best when it is built into your regular budget instead of being treated as something you will save only when extra money is left over. Even a small amount saved consistently can gradually create a useful financial cushion.

The RBI’s financial education material recommends keeping an emergency fund in a separate, easily accessible savings account and building it gradually if you cannot fund the entire amount at once.

For example, if you earn ₹20,000 per month, you don’t have to wait until you can save ₹60,000 or ₹1 lakh. You could start with ₹500, ₹1,000, or whatever amount your budget can comfortably handle.

Applying the Cash Stuffing Method for Emergency Cash

The cash stuffing method can help you control everyday spending, but your main emergency fund does not need to be kept as physical cash at home.

Cash stuffing usually means dividing your spending money into separate categories so you know how much you can spend on things such as groceries, transport, entertainment and other expenses.

You can use the same idea digitally for your emergency fund.

For example:

Money CategoryExample Amount
Monthly expenses₹15,000
Emergency fund₹2,000
Short-term goals₹1,500
Flexible spending₹1,500

Instead of putting ₹2,000 into an envelope and keeping it at home, you could transfer it to a separate savings account labelled for emergencies.

This gives you the psychological benefit of separating your money without keeping a large amount of cash physically at home.

The CFPB also recommends keeping emergency savings somewhere that is safe, accessible and less tempting to spend on non-emergency purchases.

If you want to learn the complete budgeting technique, you can also read our Cash Stuffing Method guide.

How to Build a Backup Fund with an Irregular Income

If your income changes every month, use a flexible savings target instead of forcing yourself to save the exact same amount every month.

For example, imagine your income looks like this:

  • January: ₹18,000
  • February: ₹25,000
  • March: ₹14,000
  • April: ₹30,000

Saving ₹5,000 every month may not be realistic. Instead, you could save a smaller amount during low-income months and put more aside when your income is higher.

For example:

Monthly IncomePossible Emergency Saving
₹14,000₹500
₹18,000₹1,000
₹25,000₹2,000
₹30,000₹3,000

These are only examples—not fixed rules. Your actual amount should depend on your essential expenses and what your budget can comfortably handle.

The CFPB specifically notes that people with fluctuating income can use cash-flow management and save more during periods when they have extra money available.

You can also use our Budget Calculator to estimate your monthly expenses and see how much you can realistically put toward your emergency fund.

If your income changes frequently, our guide How to Budget with an Irregular Income can also help you build a more flexible monthly plan.

A Simple Emergency-Fund Budget Rule

A simple approach is to treat your emergency fund as a regular budget category.

For example:

Income → Essential expenses → Emergency savings → Other goals → Flexible spending

You don’t have to start with a large amount. The important part is creating a system that you can repeat.

Once your emergency fund reaches your first target—perhaps ₹10,000 or ₹25,000—you can continue building it toward several months of essential expenses.

And if you ever need to use the fund, that’s exactly what it is there for. After the emergency is handled, make rebuilding the fund one of your next savings priorities.

This approach turns your emergency fund from a one-time goal into a habit that becomes part of your overall budgeting system.

Common Emergency Fund Mistakes to Avoid

Building an emergency fund is a great step, but where and how you keep the money matters too. Some common mistakes can make your emergency fund difficult to access when you actually need it.

Here are two mistakes beginners should avoid when setting up an emergency backup.

Locking Your Money in Long-Term Investments Like PPF or ELSS

Your main emergency fund should generally not be locked into long-term investments such as PPF or ELSS, because an emergency can happen before the money becomes easily accessible.

PPF is designed as a long-term savings scheme. The account has a 15-year maturity period, although certain withdrawals and other facilities are available under specific conditions. (indiapost.gov.in)

ELSS mutual funds have a 3-year lock-in period for each investment. That means you cannot simply redeem your ELSS investment whenever you want during the applicable lock-in period. SEBI also describes mutual funds as market-linked investments where returns are not guaranteed. (sebi.gov.in)

Imagine you suddenly need ₹30,000 for an urgent expense. If that money is sitting inside a product with access restrictions, you may have to find another source of money.

That’s why it helps to separate your financial goals:

MoneySuitable Purpose
Emergency fundUnexpected expenses
PPFLong-term savings
ELSSLong-term investment/tax-saving goals
Goal savingsPlanned expenses
Other investmentsLong-term wealth building

Your emergency fund doesn’t need to generate the highest possible return. Accessibility and safety are more important for money you may need unexpectedly.

If you’re working toward several goals at the same time, our guide on How to Organize Multiple Savings Goals Before 2027 can help you separate emergency savings from other goals.

Keeping Too Much Physical Cash at Home

Keeping a small amount of cash for immediate needs can be practical, but your entire emergency fund should generally not be stored as physical cash at home.

For example, keeping ₹2,000–₹5,000 at home for situations where digital payments aren’t available may be different from keeping ₹1 lakh in cash at home.

Large amounts of physical cash can be exposed to risks such as theft, loss, fire or simply being forgotten or spent. It also doesn’t earn interest while sitting unused.

A better approach can be to keep a small cash buffer for immediate situations and store the larger emergency fund in an appropriate separate bank account or other suitable accessible option.

For bank deposits, DICGC provides deposit insurance up to ₹5 lakh per depositor per bank, subject to the applicable rules. This is another reason to understand how your bank deposits are covered rather than assuming every type of financial product has the same protection. (dicgc.org.in)

A Simple Way to Avoid Both Mistakes

You can keep your money organised into three simple buckets:

1. Immediate cash: A small amount for situations where cash is necessary.

2. Emergency fund: Money kept in an easily accessible, suitable savings option for unexpected expenses.

3. Long-term investments: Money invested for goals that are years away.

This separation makes your financial system easier to understand and reduces the chance of using long-term investments for short-term emergencies.

And remember, an emergency fund is not supposed to make you rich. Its job is to protect your financial plan when life doesn’t go according to plan.

How Much Emergency Fund Should I Have?

A common starting target is 3–6 months of essential living expenses. But you don’t have to reach that amount immediately.If your essential expenses are ₹20,000 per month, a 3-month emergency fund would be ₹60,000, while 6 months would be ₹1.2 lakh. If that feels too large, start with a smaller target such as ₹10,000 or ₹25,000 and build it gradually.

Where Should I Keep My Emergency Fund?

Keep your emergency fund somewhere safe and easily accessible, such as a separate savings account or another suitable low-risk option.The main goal is not to get the highest possible return. You want the money to be available when an unexpected expense happens without taking unnecessary investment risk.

Should I Keep My Emergency Fund in One Bank Account?

You don’t necessarily have to keep the entire emergency fund in one account. You can keep some money immediately accessible in a savings account and use another suitable option for the remaining amount, depending on your needs.For larger bank deposits, remember that DICGC deposit insurance has an applicable limit of ₹5 lakh per depositor per bank, subject to its rules.

Conclusion: Take the First Step Towards Financial Peace of Mind
An emergency fund is one of the simplest ways to protect yourself from unexpected financial problems. Whether it’s a medical expense, urgent repair, sudden travel, or a temporary loss of income, having money set aside can help you handle these situations without immediately depending on credit or loans.
The key is to understand that an emergency fund is different from your regular savings goals. Your emergency money should be kept separate, easily accessible, and in a place where you can use it when you genuinely need it.
For many people, a separate savings account can be a simple starting point. A sweep-in FD can be considered for part of the fund, while liquid mutual funds are an option that should be understood carefully because they are market-linked and not the same as bank deposits.
You also don’t need to build your emergency fund overnight. Start with whatever amount your budget allows and gradually work toward 3–6 months of essential expenses. If your income is irregular, adjust your contribution according to your income instead of forcing yourself to save the same amount every month.
Most importantly, avoid common mistakes such as locking your emergency money into long-term investments or keeping a large amount of physical cash at home.
Start small, keep it separate, and keep building it. A well-planned emergency fund may not feel exciting, but when an unexpected expense arrives, it can give you something much more valuable: financial breathing room.

How to Organize Multiple Savings Goals Before 2027: A Simple Money Plan

planning-your-financial-future.webp
Home » Archives for September 2026

Planning for multiple financial goals can feel overwhelming. This simple guide shows you how to prioritize your goals, set realistic targets, calculate monthly savings, and stay on track for 2027.

Saving for one goal is simple. But when you have several goals at the same time—such as an emergency fund, annual expenses, a new laptop, a trip, or future needs—it can become difficult to know where your money should go first.

The key is not to save for everything equally. You need to organize multiple savings goals, set priorities, and decide how much to save for each goal based on its deadline and importance.

In this guide, you’ll learn how to organize your savings goals, set realistic targets, calculate your monthly savings, and create a simple plan you can follow before 2027.

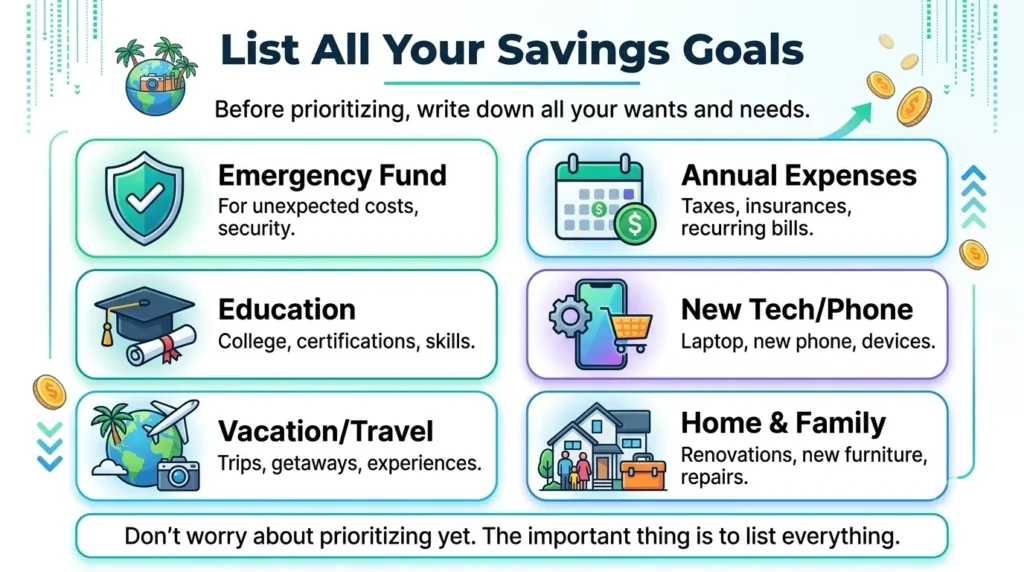
Step 1: List All Your Savings Goals

Before deciding how much to save for each goal, write down everything you want or need to save for.

Include both important financial goals and upcoming expenses, such as:

  • Emergency fund
  • Annual bills or expenses
  • Education
  • New phone or laptop
  • Vacation or travel
  • Home or family expenses
  • Other planned purchases

Don’t worry about prioritizing them yet. The first goal is simply to get a clear picture of where your money may need to go.

Once you have listed everything, you can group the goals by time frame, importance, and deadline. This makes it much easier to decide which goals should receive more attention first.

Step 2: Separate Short-Term, Medium-Term, and Long-Term Savings Goals

Not every savings goal has the same deadline. A bill due next month needs a different approach from a car you want to buy in three years or a future financial goal that may take much longer.

That is why one of the easiest ways to organize multiple savings goals is to separate them by time frame.

Short-Term Savings Goals

Short-term goals are goals you expect to reach relatively soon, such as annual bills, emergency expenses, a phone, or a planned purchase.

These goals usually need more immediate attention because their deadlines are closer.

Medium-Term Savings Goals

Medium-term savings goals sit between immediate expenses and long-term financial goals. They may take several months or a few years to complete, depending on the size and deadline of the goal.

Common examples include:

  • Buying a car
  • Saving for education or training
  • A major home expense
  • Starting a small business
  • Saving for a wedding or major event
  • Preparing for a large planned purchase

The advantage of a medium-term goal is that you have more time to build the money. Instead of trying to save a large amount at once, you can break the target into smaller monthly savings contributions.

How to Calculate a Medium-Term Savings Target

Use this simple formula:

Target Amount ÷ Months Remaining = Monthly Savings Needed

For example, suppose your goal is to save $3,000 in 30 months.

$3,000 ÷ 30 = $100 per month

So your basic monthly savings target would be $100.

GoalTargetTime RemainingMonthly TargetPriority
Education$3,00030 months$100High
Car fund$6,00036 months$167Medium
Major purchase$1,50024 months$63Low

This gives you a clearer picture of how much each goal requires instead of simply saving money without knowing whether you are on track.

What If the Monthly Amount Is Too High?

This is where a realistic savings plan matters.

If your calculated monthly contribution does not fit your budget, you have several options:

  • Extend the deadline if possible.
  • Reduce the target amount.
  • Give the goal a lower priority.
  • Temporarily focus on a more important goal.
  • Look for ways to reduce expenses or increase available savings.

You do not have to abandon a goal just because the first calculation does not fit your current cash flow.

The Consumer Financial Protection Bureau recommends breaking savings goals into manageable targets and considering the amount needed and the time available when creating a savings plan.

For a broader reference, you can also review the CFPB’s savings and goal-setting tools, which include tools for setting goals, planning savings, tracking money, and preparing for large purchases.

For your own numbers, you can use our budget calculator to see how your income and expenses affect the amount available for different savings goals.

The important point is simple: medium-term goals should have a target, deadline, and monthly contribution. Once those three numbers are clear, a large future expense becomes much easier to manage.

Step 3: Prioritize Your Savings Goals

Once you have separated your goals by time frame, the next step is to decide which savings goals should come first.

When you have multiple savings goals, you do not always need to divide your money equally. Some goals are more important because they protect your financial stability, have a fixed deadline, or could create a bigger problem if you do not prepare for them.

A simple priority system can help you decide where your monthly savings should go first.

Start With Financial Safety

Before putting a large amount toward optional goals, consider whether you have enough money set aside for unexpected expenses.

An emergency fund can help cover unexpected costs such as an urgent repair, medical expense, or temporary loss of income without forcing you to depend on debt.

Your financial priorities will depend on your situation, but building a basic financial safety net is often an important starting point.

For a broader overview, read our guide to the 7 rules of personal finance, which explains the role of budgeting, emergency savings, debt management, and long-term financial goals.

Consider the Deadline and Consequences

Not every savings goal has the same level of urgency. A goal with a fixed deadline may need more attention than a goal that can be delayed.

Before deciding how to divide your savings, ask yourself:

  • Does this expense have a fixed deadline?
  • What happens if I do not save enough by that date?
  • Is the goal essential or optional?
  • Can I delay the goal without creating a financial problem?
  • Could failing to prepare lead to debt or another financial cost?
  • Does this goal protect my basic financial needs?

For example, an annual insurance payment due in three months may deserve more attention than a vacation planned for next year.

The vacation can still be an important savings goal, but its deadline and consequences are different.

Use a High, Medium, and Low Priority System

A simple three-level priority system makes it easier to manage multiple savings goals without feeling overwhelmed.

PriorityType of GoalExample
HighFinancial safety or essential deadlineEmergency fund, essential annual expense
MediumImportant planned expenseEducation, major repair, vehicle
LowOptional or flexible goalVacation, new gadget, entertainment

This does not mean low-priority goals should never receive money. It simply means they should not take money away from a more important financial need when your available savings are limited.

How to Divide Money Between Savings Goals

If your monthly savings amount is limited, a useful starting order is:

  1. Financial safety
  2. Essential upcoming expenses
  3. Important planned goals
  4. Optional goals

For example, suppose you can save $300 per month and you have three goals:

  • Emergency fund — High priority
  • Education — Medium priority
  • Vacation — Low priority

Instead of automatically giving each goal $100, you could direct more of your available savings toward the emergency fund and education while making a smaller contribution toward the vacation.

The exact amounts depend on your income, essential expenses, current savings, and the deadlines of your goals.

If you want to connect your savings goals with your income and expenses, see our guide to financial planning for beginners.

Do Not Try to Fund Every Goal Equally

One common mistake when managing multiple savings goals is assuming that every goal should receive the same amount of money.

For example, imagine you have $500 available for savings and the following goals:

GoalAmount NeededDeadlinePriority
Emergency fund$1,500FlexibleHigh
Annual bill$6004 monthsHigh
Laptop$1,00010 monthsMedium
Vacation$1,20012 monthsLow

An equal split would give each goal $125. But the annual bill has a much closer deadline, while the vacation may be more flexible.

Your savings plan should reflect importance and urgency, not simply equality.

What If Two Savings Goals Have the Same Priority?

When two goals are equally important, use their deadlines to decide which one should receive more attention.

As a simple rule, consider the goal that:

  1. Has the earlier deadline.
  2. Requires a larger monthly contribution.
  3. Has greater consequences if you miss the target.

You can also change the priority later. Your income, expenses, deadlines, and financial goals may change, so your savings plan should be flexible enough to change with them.

Keep Your Savings Priorities Simple

You do not need a complicated financial planning system to organize multiple savings goals.

For each goal, know these four things:

  • What you are saving for
  • How much you need
  • When you need it
  • How important it is compared with your other goals

Once these details are clear, it becomes much easier to decide where your money should go each month.

The goal is not to create a perfect plan that never changes. The goal is to build a practical savings plan that gives every dollar a purpose while keeping your most important financial goals on track.

Step 4: Set a Target Amount and Deadline for Every Savings Goal

Once you know which savings goals are most important, give each goal a specific target amount and deadline.

“I want to save more money” is a good intention, but it is difficult to follow because there is no clear finish line. A better savings plan tells you exactly how much you need, when you need it, and how much you should save each month.

This approach can make multiple savings goals much easier to organize and track.

Give Every Financial Goal a Specific Target

Start by deciding the approximate amount you need for each goal.

For example, instead of writing:

  • Save for a laptop
  • Save for a trip
  • Save for education

Turn them into measurable goals:

  • Laptop — $1,000
  • Trip — $1,500
  • Education — $3,000

A specific target gives you something you can calculate against. It also makes it easier to see whether your current monthly savings are enough.

Set a Realistic Savings Deadline

After deciding the target amount, choose when you want or need to reach it.

Your deadline can be based on:

  • A fixed bill or payment date
  • A planned purchase
  • A school or education deadline
  • A planned trip or event
  • A personal financial milestone
  • A timeframe that is realistic for your income

Try not to choose a deadline simply because it sounds good. A deadline should be realistic enough that you can continue making the required monthly contribution without putting your essential expenses under pressure.

Calculate the Time You Have Left

Once you know the target and deadline, calculate how many months you have remaining.

For example:

GoalTargetTime AvailableApprox. Monthly Saving
Laptop$1,00010 months$100
Trip$1,50012 months$125
Education$3,00024 months$125

These numbers give you a starting point for building your monthly savings plan. In the next step, we will use the same information to calculate the required monthly contribution more precisely.

Use the SMART Approach for Savings Goals

A useful way to make a savings goal clearer is to make it specific and measurable, with a realistic timeframe.

For example:

Vague goal: “I want to save for a laptop.”

Clear goal: “I want to save $1,000 for a laptop within 10 months.”

The second goal gives you three important pieces of information:

  • What: Laptop
  • Target: $1,000
  • Deadline: 10 months

The Consumer Financial Protection Bureau’s SMART savings goal worksheet also uses a structured approach to help people turn a general savings intention into a clearer goal.

Use the Same Method in USD, GBP, or INR

The currency does not change the basic method. Whether you are saving in US dollars, British pounds, or Indian rupees, the process is the same:

Target amount → Deadline → Months remaining → Monthly savings requirement

For example:

CurrencyGoalTargetTime
USDLaptop$1,00010 months
GBPHoliday£1,20012 months
INREducation₹120,00024 months

You do not need to convert these amounts into one currency. Keep each goal in the currency you will actually spend.

What If the Target Is Too High for Your Income?

This is where your savings plan becomes practical.

Suppose you calculate that you need to save $400 per month for several goals, but after essential expenses you can realistically save only $250.

Do not simply assume you have failed. Rework the plan.

You could:

  • Extend the deadline
  • Reduce the target amount
  • Give higher priority to the most important goal
  • Temporarily pause a lower-priority goal
  • Reduce unnecessary expenses
  • Increase your savings contribution when your income rises

A realistic savings target that you can consistently follow is usually more useful than an aggressive target that makes your monthly budget impossible to maintain.

Keep Your Savings Goals in One Simple Table

Once you have several goals, put the important numbers in one place. This makes it easier to see the complete picture instead of keeping separate notes in your head.

GoalTargetSavedRemainingDeadlinePriority
Emergency fund$1,500$600$900FlexibleHigh
Laptop$1,000$250$75010 monthsMedium
Vacation$1,200$300$90012 monthsLow

This simple savings tracker gives you a quick view of what you are saving for, how much you have already saved, what remains, and which goals deserve the most attention.

Once every goal has a target and deadline, the next step is to calculate exactly how much you need to save each month.

Step 5: Calculate Your Monthly Savings for Each Goal

Now that every savings goal has a target amount and deadline, you can calculate how much you need to save each month.

This is the point where a list of financial goals becomes an actual savings plan. Instead of guessing how much to put aside, you can work backward from the amount you need and the time available.

Use the Monthly Savings Formula

The basic calculation is simple:

Monthly Savings Needed = Amount Remaining ÷ Months Remaining

For example, suppose you want to save $1,200 for a planned purchase and you have 12 months remaining.

$1,200 ÷ 12 = $100 per month

So, you would need to set aside approximately $100 each month to reach the target, assuming the money you save does not earn additional returns and there are no extra costs.

Calculate Each Savings Goal Separately

When you have multiple savings goals, calculate the monthly contribution for each one instead of combining all the targets into one number.

GoalAmount RemainingMonths RemainingMonthly Savings
Emergency fund$1,00010$100
Laptop$9009$100
Vacation$1,20012$100

In this example, the total monthly requirement would be:

$100 + $100 + $100 = $300 per month

Now you can compare that $300 requirement with the amount your monthly budget can realistically provide.

Check Your Monthly Savings Capacity

Before committing to a savings target, look at your actual cash flow.

A simple starting calculation is:

Monthly Income − Essential Expenses − Required Payments = Potential Savings

For example:

Monthly BudgetAmount
Income$2,500
Essential expenses$1,700
Required payments and regular spending$400
Potential savings$400

If your savings goals require $300 per month and you can realistically save $400, the plan has some room for unexpected expenses or faster progress.

If your goals require $550 but your realistic savings capacity is only $400, you need to adjust the goals rather than forcing an unrealistic budget.

Use a Budget Calculator to Find Your Available Savings

Working out your income and expenses manually can become difficult when you have several financial goals.

You can use our Budget Calculator to organize your income and spending and get a clearer idea of how much money may be available for savings each month.

Once you know your available savings amount, you can compare it with the monthly contribution required for each goal.

What If Your Monthly Savings Requirement Is Too High?

This is one of the most important parts of creating a realistic savings plan.

If the numbers do not fit your budget, do not simply cut essential expenses or put yourself under unnecessary financial pressure. Rework the plan.

You can:

  • Extend the deadline: Give yourself more months to reach the target.
  • Reduce the target: Look for a lower-cost version of the planned purchase.
  • Prioritize: Put more money toward essential or time-sensitive goals.
  • Pause a lower-priority goal: Temporarily stop funding a flexible goal.
  • Increase your savings capacity: Reduce unnecessary spending or direct future extra income toward the goal.
  • Review the target: Make sure the original amount is still realistic.

A savings plan should fit your real financial situation. A target that looks impressive on paper but cannot be maintained every month is not a useful target.

Use the Deadline to Adjust Your Monthly Contribution

Your monthly savings requirement can change when the deadline changes.

TargetDeadlineMonthly Savings
$1,2006 months$200
$1,20012 months$100
$1,20018 monthsAbout $67

This shows why the deadline matters. The same savings goal can require very different monthly contributions depending on how much time you have.

Do Not Forget the Amount You Have Already Saved

If you have already saved part of the money, calculate the monthly requirement using the remaining amount, not the original target.

For example:

Target: $2,000
Already saved: $500
Remaining: $1,500
Time remaining: 10 months

$1,500 ÷ 10 = $150 per month

This makes your savings target more accurate and prevents you from saving more than necessary for the same goal.

Keep a Small Buffer for Real Life

Monthly budgets do not always go exactly as planned. An unexpected expense can temporarily reduce the amount you are able to save.

For that reason, avoid building a savings plan that uses every available dollar with no flexibility.

If your calculations show that you can save $400 per month, but your goals require exactly $400, consider whether you need some breathing room for irregular expenses before committing to the full amount.

This is especially important when your income changes from month to month.

The Consumer Financial Protection Bureau’s Your Money, Your Goals toolkit also provides tools and guidance for setting goals, planning spending, and managing savings.

A Simple Rule for Multiple Savings Goals

Once you calculate the monthly requirement for every goal, add them together and compare the total with your realistic monthly savings capacity.

If required savings ≤ available savings: Your plan may be realistic.

If required savings > available savings: Prioritize the goals and adjust the deadlines, targets, or contributions.

This simple comparison can prevent a common problem: creating too many savings goals without checking whether your income can actually support them.

In the next step, we will look at how to divide your available money between multiple savings goals when you cannot fully fund every goal at the same time.

Step 6: How to Divide Money Between Multiple Savings Goals

Knowing how much you need to save each month is only half the job. When you have several financial goals, you also need to decide how to divide your available savings between them.

You do not have to give every goal the same amount. The right approach depends on each goal’s priority, deadline, target amount, and how much you can realistically save after your regular expenses.

The aim is to create a savings plan that is realistic enough to follow every month while still moving your most important financial goals forward.

First, Know How Much You Can Save Each Month

Before deciding how much goes into each goal, calculate your available monthly savings.

A simple starting point is:

Monthly Income − Essential Expenses − Required Payments = Potential Savings

For example, if your monthly income is $2,500, essential expenses are $1,700, and other required payments and regular spending total $400, you may have around $400 available for savings.

You can use our Budget Calculator to organize your income and expenses and get a clearer picture of how much you may be able to save each month.

If you want a broader approach to dividing your income between spending, savings, and financial priorities, you can also read our guide on how to divide your salary for beginners.

Method 1: Equal Contribution for Multiple Savings Goals

The simplest approach is to divide your available savings equally between your goals.

For example, if you can save $300 per month and have three goals, you could contribute:

  • Goal 1 — $100 per month
  • Goal 2 — $100 per month
  • Goal 3 — $100 per month

This method is easy to understand and can work well when the goals have similar importance and similar deadlines.

However, equal contributions are not always the best option. If one goal has a much earlier deadline or greater financial importance, it may need a larger share of your monthly savings.

Method 2: Priority-Based Savings

With a priority-based savings plan, you give more of your available money to goals that are more important and reduce contributions to goals that can wait.

A simple order could be:

  1. Financial safety
  2. Essential upcoming expenses
  3. Important planned goals
  4. Optional goals

For example, if you are building an emergency fund while also saving for a vacation, you may decide that the emergency fund deserves a larger contribution because it provides greater financial protection.

This method can be especially useful when your monthly savings are limited and you cannot fully fund every goal at the same time.

Method 3: Deadline-Based Savings

Another practical method is to divide your savings according to how soon each goal needs to be funded.

Suppose you have the following goals:

GoalAmount RemainingTime RemainingPriority
Annual bill$6004 monthsHigh
Laptop$1,00010 monthsMedium
Vacation$1,20012 monthsLow

The annual bill has the closest deadline, so it may need more immediate attention. The laptop and vacation goals have more time, which gives you greater flexibility with their contributions.

This method is particularly useful for short-term and medium-term savings goals where missing a deadline could create a financial problem.

Which Savings Method Should You Choose?

There is no single method that works for every person or every savings goal. You can choose one method or combine several.

MethodBest ForMain Advantage
Equal contributionGoals with similar importanceSimple and easy to maintain
Priority-basedLimited monthly savingsFocuses money on important goals
Deadline-basedGoals with different due datesHelps prevent missed deadlines

For example, you could use a priority-based approach for your emergency fund and essential expenses, then divide whatever remains between flexible goals.

Example: Dividing $500 Between Multiple Savings Goals

Suppose you have $500 available for savings each month and four goals:

GoalPriorityMonthly Contribution
Emergency fundHigh$200
Annual expensesHigh$150
LaptopMedium$100
VacationLow$50
Total$500

This is only an illustrative example, not a universal rule. Your own allocation should be based on your income, expenses, current savings, deadlines, and priorities.

The important idea is that you do not need to divide your money equally just because you have multiple goals.

Match Your Savings Allocation With Your Financial Plan

Your savings goals should not exist separately from the rest of your budget. They should fit into your overall financial plan.

Consider:

  • Your monthly income
  • Essential living expenses
  • Existing debt or required payments
  • Emergency savings
  • Upcoming annual expenses
  • Short-term financial goals
  • Longer-term goals

Our guide to financial planning for beginners explains how different money priorities can be organized into a broader financial plan.

For additional guidance on setting savings goals and creating a savings plan, you can also refer to the Consumer Financial Protection Bureau’s savings plan tool.

What If You Cannot Fund Every Goal?

This is completely normal. Having several savings goals does not mean you have to make progress on all of them at the same speed.

If your required monthly contributions are higher than your available savings, you can:

  • Focus on the highest-priority goal first.
  • Give more time to a flexible goal.
  • Reduce the target amount if appropriate.
  • Temporarily pause a lower-priority goal.
  • Redirect money to another goal after completing one target.
  • Increase contributions later when your financial situation improves.

A realistic savings plan is better than a complicated plan that consistently leaves you short of money.

Review and Rebalance Your Savings Goals

Your savings allocation does not need to remain unchanged throughout the year.

Review your plan at least once a month and consider whether:

  • Your income has changed.
  • Your regular expenses have increased or decreased.
  • A deadline is getting closer.
  • You have already reached one of your targets.
  • A new essential expense has appeared.
  • One goal has become more or less important.

For example, once you finish saving for an annual expense, you can redirect that monthly contribution toward your next priority instead of leaving the money unassigned.

A Simple Rule for Dividing Your Savings

If you are unsure where your money should go, ask yourself three questions every month:

  • What is most important right now?
  • Which goal has the nearest deadline?
  • How much can I realistically save this month?

Your answers can help you decide how to divide money between multiple savings goals without making your budget unnecessarily complicated.

The goal is not to save the same amount for everything. The goal is to give your available money a clear purpose while keeping your most important financial goals on track.

How many savings goals should I have at one time?

There is no fixed number of savings goals you should have. Start with the goals that are most important and realistic for your current income. Too many goals can make it harder to stay consistent, so focus on your priorities first.

Should I save for multiple goals at the same time?

Yes. If your budget allows, you can save for several goals at the same time. Give more money to urgent or essential goals and smaller amounts to flexible goals.

What should I do if I cannot save enough for all my goals?

Prioritize your most important goals instead of trying to fund everything equally. You can reduce optional targets, extend deadlines, or increase your monthly savings later when your income improves.

How often should I review my savings goals?

Review your savings plan at least once a month. Check your progress, remaining amount, deadlines, and monthly contributions. Adjust the plan whenever your income, expenses, or priorities change

Final Thoughts: How to Organize Multiple Savings Goals

Managing multiple savings goals becomes much easier when every goal has a clear target, deadline, and priority. Instead of trying to save for everything equally, focus your money on what matters most and adjust your plan as your situation changes.

Start small, stay consistent, and review your progress each month. A simple plan you can follow is more valuable than a complicated plan you cannot maintain.

Cash Stuffing Method for Beginners: A Simple Step-by-Step Guide

Cash stuffing method for beginners with labeled budgeting envelopes
Home » Archives for September 2026

Managing money can feel difficult when small purchases keep adding up throughout the month. The cash stuffing method offers a simple way to give each spending category a clear limit and make your budget easier to see and follow.Instead of keeping your entire spending budget in one place, you divide cash into separate categories such as groceries, transportation, eating out, or personal spending. When an envelope gets low, you know exactly how much is left for that category.In this guide, you’ll learn how cash stuffing works, how to set up your first envelopes, how much to allocate to each category, and how to adapt the method for different budgets and payment habits.

What Is the Cash Stuffing Method for Beginners?

The cash stuffing method for beginners is a simple way to organize your spending by separating money into different categories. Instead of keeping all your spending money together, you decide how much you want to use for groceries, transportation, eating out, entertainment, or other everyday expenses.

The basic idea is simple: give your money a purpose before you spend it.

For example, if you have $500 available for flexible spending, you might divide it between several categories instead of treating the entire $500 as available for anything. In India, the same idea could be applied to ₹40,000 of monthly income or spending money. The actual amounts depend on your income, bills, and personal circumstances.

How Does Cash Stuffing Work

Traditional cash stuffing uses physical envelopes. Each envelope represents a spending category, and you place the amount you’ve budgeted for that category inside it.

A simple setup might include:

  • Groceries
  • Transportation
  • Eating out
  • Entertainment
  • Personal spending
  • Miscellaneous

When you spend money, you take it from the relevant category. If your grocery envelope has $150 left, for example, you know that $150 is what remains for groceries under that budget.

The system is closely related to the cash envelope system and traditional envelope budgeting. The Consumer Financial Protection Bureau (CFPB) has also discussed the envelope approach as a way of separating money for different spending categories.

Why Do People Use Cash Stuffing?

The main attraction is visibility.

When your spending money is separated into categories, it can be easier to notice how much you have left before making another purchase.

That doesn’t mean cash stuffing will automatically stop overspending. It simply gives you a clear spending boundary to work with.

For someone who regularly wonders, “Where did my money go this month?”, seeing separate amounts for different categories can make budgeting feel more concrete.

Does Cash Stuffing Mean Using Only Physical Cash?

Not necessarily.

Physical envelopes are the traditional version, but the underlying idea can also work with digital budgeting.

Someone in the US might use cash envelopes for groceries and entertainment while keeping rent and online bills in a bank account.

A UK reader might use digital “pots” for some categories.

In India, where UPI and digital payments are widely used, someone may prefer a hybrid approach—keeping some categories in cash while tracking other spending digitally.

The important principle is separating money by purpose, not carrying every expense in your wallet.

Cash Stuffing at a Glance

ElementWhat it means
IncomeMoney available for your budget
CategoriesDifferent types of spending
EnvelopesSeparate places for each category
Spending limitAmount assigned to a category
TrackingRecording what you spend
ReviewChecking what worked and what needs adjusting

This is only the basic idea. The next step is understanding how to actually set up a cash stuffing budget, choose the right categories, and decide how much money should go into each one.

How Much Money Should You Put in Each Cash Stuffing Envelope?

Once you know your income and regular expenses, the next step is deciding how much money to put into each envelope.

There is no single amount that works for everyone. Your cash stuffing budget should reflect your income, essential expenses, family situation, location, and normal spending habits.

A good starting point is to look at what you actually spend rather than copying someone else’s envelope amounts.

Start With Your Real Spending

Before setting your limits, look at your recent bank statements, receipts, or budgeting records.

You might notice that groceries regularly cost more than you expected, while entertainment spending is much smaller.

That information is useful.

Try to identify the categories where your spending is both variable and controllable.

Common examples include:

  • Groceries
  • Eating out
  • Transportation
  • Entertainment
  • Clothing
  • Personal spending
  • Household purchases
  • Miscellaneous expenses

If you don’t know your spending patterns yet, track them for a few weeks before creating strict limits.

This makes the cash envelope system more realistic and easier to maintain.

Separate Fixed Bills From Flexible Spending

Cash stuffing doesn’t require you to put every expense into a physical envelope.

Some expenses are already predictable or automatically paid from your bank account.

For example:

  • Rent or mortgage
  • Insurance
  • Loan payments
  • Subscriptions
  • Internet and phone bills
  • Other recurring payments

Cash envelopes are usually more useful for spending that can change from week to week.

The goal is not to make your finances complicated. It’s to create a clear boundary around the spending you can control.

A Simple Cash Stuffing Example

Imagine someone in the US takes home $2,500 a month.

After accounting for essential bills, savings, and other financial commitments, they have $600 available for selected flexible expenses.

They might start with:

CategoryExample Amount
Groceries$300
Transportation$100
Eating out$75
Personal spending$75
Miscellaneous$50
Total$600

These numbers are only an example. They are not recommended spending limits.

A person in the UK might work with £500, while someone in India might have ₹10,000 available for similar variable categories.

The currency and cost of living change, but the basic idea remains the same: divide the money according to your own spending needs.

Don’t Set Unrealistic Envelope Limits

One common beginner mistake is trying to make the budget look perfect on paper.

Suppose you normally spend around $350 on groceries but decide to put only $200 into your grocery envelope because you want to save more.

If you run out of money halfway through the month, the problem may not be the cash stuffing method. Your original limit may simply have been unrealistic.

A better approach is to start with your actual spending and make gradual adjustments

What If Your Income Changes?

The cash stuffing method for beginners can also be adapted for irregular income.

If you receive money weekly, work freelance, or have changing monthly income, you don’t necessarily need to decide your entire month’s envelope amounts at once.

Instead, you can allocate money when you actually receive it.

For example:

Paycheck arrives → cover priorities → allocate flexible spending → stuff envelopes → track spending

This approach can be easier when your income isn’t the same every month.

For UK readers, MoneyHelper’s budgeting guidance provides practical information on understanding income, expenses, and household budgeting.

For Indian readers, the Reserve Bank of India’s financial education resources also emphasize planning income and expenses and comparing planned spending with actual expenditure.

Use a Budget Calculator Before You Decide

If you’re not sure how much money is actually available after your regular expenses, you can first use our Budget Calculator to organise your numbers.

Think of the process like this:

Income → Essential expenses → Savings/debt goals → Flexible spending → Cash stuffing categories

This helps prevent a common mistake: filling your envelopes first and discovering later that you don’t have enough money for an important bill.

Start Small

You don’t need ten or twenty envelopes on your first attempt.

Start with three to five categories that are genuinely useful for your spending habits.

For example:

  • Groceries
  • Transportation
  • Eating out
  • Personal spending
  • Miscellaneous

After a month, review what happened.

If one envelope consistently has money left over, you can reconsider its limit.

If another runs out too quickly, look at your actual spending before simply adding more money.

Your first cash stuffing budget doesn’t need to be perfect. It needs to be realistic enough to help you understand and control your spending.

What Categories Should You Use for Cash Stuffing?

You don’t need a separate envelope for every expense. Start with the spending categories where you are most likely to overspend.

Best Cash Stuffing Categories for Beginners

Common categories include:

  • Groceries — food and household shopping
  • Transportation — fuel, bus, train, or local travel
  • Eating Out — restaurants, snacks, and coffee
  • Personal Spending — small personal purchases
  • Entertainment — movies, games, and hobbies
  • Gifts — birthdays, festivals, and special occasions
CategoryExample
Groceries$250 / £200 / ₹8,000
Transportation$100 / £80 / ₹3,000
Eating Out$75 / £60 / ₹2,500
Personal$75 / £60 / ₹2,500

These amounts are only examples. Your actual budget should depend on your income and regular spending.

Don’t Put Every Expense in an Envelope

Fixed expenses such as rent, mortgage payments, electricity bills, and subscriptions usually don’t need physical cash envelopes. You can continue paying them digitally or through your bank account.

For irregular expenses like gifts, clothing, or annual costs, a sinking fund can be useful. MoneyHelper explains sinking funds as a way to prepare for expenses that don’t happen every month.

If you are unsure how much you can actually afford for each category, first use the Budget Calculator.

Start small: 3–5 useful categories are usually easier to manage than 15–20 envelopes. Once the system becomes a habit, you can add more categories if needed.

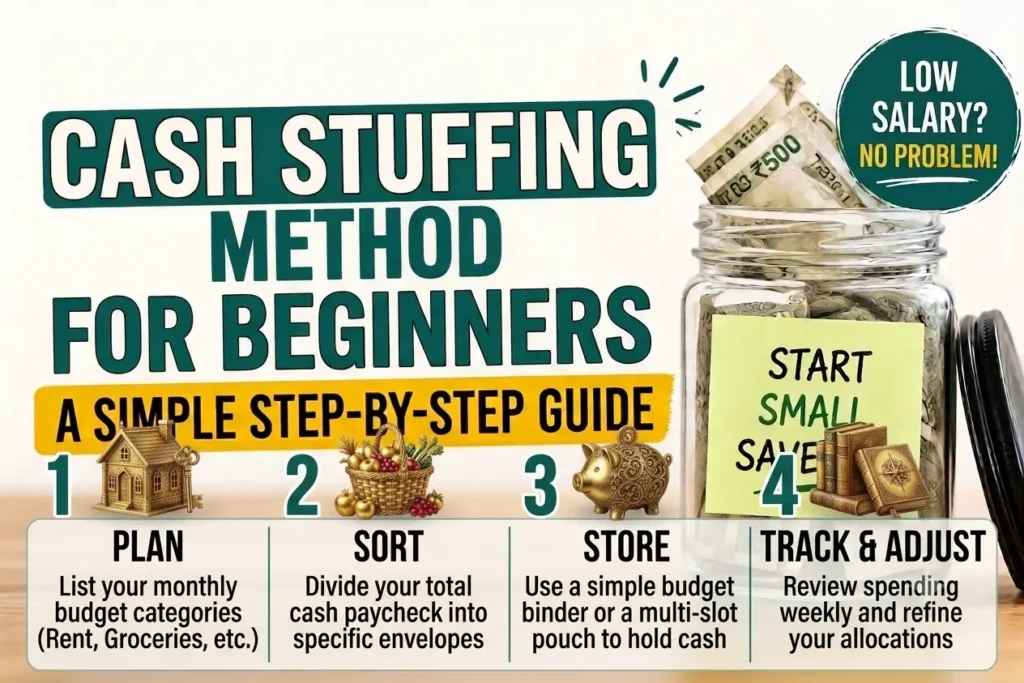
How to Start Cash Stuffing: A Step-by-Step Setup

Starting the cash stuffing method is easier when you follow a simple routine instead of trying to change all your spending habits at once. The basic idea is to decide your limits, separate the money into categories, and track what you spend.

1. Choose Your Budget Period

First, decide how often you want to organize your envelopes.

You can use a:

  • Weekly system if you prefer tighter spending control
  • Biweekly system if you get paid every two weeks
  • Monthly system if you receive a monthly salary

Your choice should match your income schedule and spending pattern.

If you want to understand how to divide your income before creating envelopes, read our How to Divide Your Salary for Beginners guide.

2. Prepare and Label Your Envelopes

Choose a few categories that you actually use.

For example:

  • Groceries
  • Transportation
  • Eating out
  • Personal spending
  • Entertainment

Write the category name clearly on each envelope. Starting with 3–5 categories can make the system easier to maintain.

3. Decide How Much Goes Into Each Envelope

Use the spending limits from your budget rather than guessing.

For example, a monthly flexible-spending budget might look like this:

CategoryExample Amount
Groceries$250
Transportation$100
Eating out$75
Personal$75

These amounts are only examples. Your actual limits should depend on your income, essential expenses, and normal spending.

You can first use our Budget Calculator to organize your numbers.

4. Track Every Purchase

This is one of the most important parts of cash stuffing.

Suppose your grocery envelope contains $250. You spend $35 at the supermarket, so your remaining amount is $215.

Writing down each purchase helps you know exactly how much is available instead of relying on memory.

MoneyHelper also recommends keeping track of income and spending when creating a workable budget. You can learn more from its budgeting guidance.

5. Review and Adjust

At the end of your budget period, check what happened.

Ask yourself:

  • Which envelope ran out first?
  • Which category had money left?
  • Were any limits unrealistic?
  • Should money be moved between categories next time?

Don’t treat going over one category as failure. It can simply show that your original estimate needs adjusting.

For readers in India, the RBI financial education material also provides guidance on budgeting and managing personal finances.

If your income is very tight and covering basic expenses is already difficult, see our paycheck-to-paycheck budgeting guide for a more focused approach.

The goal is not to follow a perfect envelope system. The goal is to create a spending system that you can realistically follow every pay period.

What Happens When a Cash Stuffing Envelope Runs Out?

One of the biggest questions beginners have is: What should you do when an envelope reaches $0 before the end of the month?

It doesn’t automatically mean your budget has failed. It may simply mean that your spending limit needs to be reviewed.

Check Before Moving Money

First, ask whether the expense is actually necessary.

For example, if your entertainment envelope is empty, you may decide to wait until the next budget period. But if your grocery budget is short because food prices were higher than expected, the situation may be different.

A simple rule is:

Needs first, wants second.

SituationWhat You Can Do
Non-essential spendingWait until the next period
Essential expenseConsider moving money from a lower-priority category
Unexpected expenseUse an appropriate emergency/savings fund
Budget repeatedly runs shortRecalculate your category limits

Can You Move Money Between Envelopes?

Yes. Your budget doesn’t have to be completely rigid.

Suppose your Eating Out envelope has $40 left, while your Groceries envelope needs another $25. If groceries are the priority, you could move $25 from Eating Out to Groceries.

The important part is to record the transfer so you know where your money went.

What If This Happens Every Month?

If the same envelope runs out repeatedly, don’t simply keep adding money to it.

Look at your actual spending and adjust the budget.

For example, if you regularly spend $300 on groceries but your budget allows only $250, your original limit may not reflect your real situation.

Our salary division guide can help you review how your income is being allocated across different priorities.

What About Leftover Money?

If an envelope still has money at the end of the period, you have several options:

  • Carry it into the next period
  • Move it toward a planned expense
  • Add it to savings
  • Keep a small buffer for future spending

For irregular expenses, a sinking-fund approach can make budgeting easier. MoneyHelper’s sinking-fund guidance explains how setting money aside over time can help prepare for expenses that don’t happen every month.

The goal of cash stuffing isn’t to punish yourself for spending. It’s to make your spending choices visible and intentional. If you’re already struggling to cover essential expenses, our paycheck-to-paycheck budgeting guide covers a more focused approach for tight budgets.

Cash Stuffing vs. Digital Budgeting: Which Is Better?

Cash stuffing works by making your spending limits visible through separate cash envelopes. Digital budgeting uses bank accounts, budgeting apps, spreadsheets, or digital savings pots to organize the same idea electronically.

Neither method is automatically better. The right choice depends on how you normally spend and how often you use cash.

FeatureCash StuffingDigital Budgeting
Spending visibilityVery highHigh
Physical cash neededYesNo
Card/UPI paymentsLimited unless hybridEasy
TrackingManualOften automatic
Best forControlling flexible spendingDigital-first spending

When Cash Stuffing Can Work Well

Physical cash can make a spending limit feel more concrete. Once the envelope is nearly empty, you can immediately see that you’re approaching your limit.

This can be particularly useful for categories such as groceries, eating out, entertainment, or personal spending.

When Digital Budgeting Makes More Sense

Cash isn’t practical for every expense. Rent, subscriptions, online shopping, bills, and many everyday transactions are normally paid digitally.

That’s why a hybrid cash stuffing system can be useful. You might use cash for flexible spending while keeping fixed bills and other payments in your bank account.

For readers in the UK, MoneyHelper’s jam jar approach shows how separating money into different pots can also be done digitally.

In India, where digital payments are widely used, you can combine cash envelopes with separate bank-account or savings categories rather than forcing every expense into physical cash.

Which Should Beginners Choose?

Start with the method you are most likely to follow consistently.

If you often overspend on small purchases, physical envelopes may give you stronger spending awareness. If you rarely use cash, a digital or hybrid approach may be more practical.

You can also combine this method with the broader budgeting principles in our Personal Finance for Beginners guide.

The goal isn’t to use cash simply because it’s called “cash stuffing.” The goal is to give every spending category a clear limit and make your money easier to manage.

Common Cash Stuffing Mistakes Beginners Should Avoid

Cash stuffing looks simple, but a few common mistakes can make the system difficult to maintain. The good news is that most of them are easy to fix.

1. Creating Too Many Envelopes

You don’t need an envelope for every small expense.

Starting with 15–20 categories can make your budget feel like another chore. Begin with 3–5 important spending categories and add more only when necessary.

2. Setting Unrealistic Limits

A budget shouldn’t be based on what you wish you spent. It should reflect your actual situation.

If you normally spend $300 on groceries but set a $150 limit without a realistic plan to reduce costs, the envelope may run out quickly.

Review your real spending before changing your limits. Our Budget Calculator can help you organize your numbers.

3. Trying to Use Cash for Everything

Not every expense needs a physical envelope.

Rent, subscriptions, online payments, and many bills can remain digital. A hybrid budgeting system can be more practical than forcing every payment into cash.

4. Forgetting to Track Spending

Cash can disappear quickly when you make several small purchases.

Write down each transaction or keep a simple note on your phone. This makes it easier to understand where your money is actually going.

5. Taking Money From Other Envelopes Without Recording It

Moving money between categories is sometimes reasonable. But repeatedly doing it without tracking the changes can hide the real problem.

If you keep taking money from groceries to cover entertainment, for example, your category limits may need to be reviewed.

6. Ignoring Irregular Expenses

Some expenses don’t appear every month but still need planning.

Gifts, annual subscriptions, clothing, repairs, and seasonal expenses can be handled through a sinking fund rather than pretending they don’t exist.

MoneyHelper’s guide to sinking funds explains how setting aside smaller amounts over time can help prepare for less frequent expenses.

7. Giving Up After One Bad Month

One difficult month doesn’t mean cash stuffing doesn’t work for you.

Your first budget is an estimate. After a few weeks, you’ll have better information about your actual spending habits.

If you’re managing a very tight income, our How to Budget When Living Paycheck to Paycheck guide can help you build a more realistic spending plan.

For broader money-management principles, you can also explore our 7 Rules of Personal Finance guide.

The Simple Rule to Remember

Don’t try to make your cash stuffing system perfect. Make it sustainable.

Start with a few categories, use realistic limits, track your spending, and adjust the system when your circumstances change. That’s what turns cash stuffing from a budgeting experiment into a habit you can actually maintain.


Is cash stuffing good for beginners?

Yes. Cash stuffing can be beginner-friendly because it gives each spending category a clear limit and makes it easier to see how much money is available.

How much money should I put in cash stuffing envelopes?

Use an amount that fits your actual budget. After essential expenses, divide your flexible spending money between categories such as groceries, transportation, personal spending, and entertainment.

What happens if I run out of money in an envelope?

Check whether the expense is essential. If it is, you can move money from a lower-priority category and record the transfer. For non-essential spending, waiting until the next budget period may be the better option.

Can I do cash stuffing without using physical cash?

Yes. You can use a digital or hybrid system with bank accounts, savings pots, spreadsheets, or budgeting apps. The principle remains the same: separate your money into spending categories with clear limits

Conclusion

The cash stuffing method can be a simple way to make everyday spending easier to understand and control. Instead of treating your entire budget as one amount, you give different spending categories clear limits.

You don’t need to start with a complicated system. Choose a few categories, set realistic amounts, track your spending, and adjust your envelopes when your real spending doesn’t match your original plan.

And remember, cash stuffing doesn’t have to mean using physical cash for everything. A digital or hybrid approach can work too, especially for bills and online payments.

The best budgeting system is the one you can understand, follow, and maintain consistently. Start small, learn from each budget period, and improve your system over time.